ESP32 Camera Streaming over WiFi with Python
Stream frames from your ESP32 Camera using WiFi and process them in Python to visualize with Napari.
Introduction
The ESP32 camera offers both a connection to available networks and the ability to create its own access point. With the aid of a web server, we can seamlessly interact with it using HTTP requests from various platforms, including Python. This tutorial walks you through the process of streaming video from the ESP32 Camera and visualizing it using Napari.
Prerequisites
Hardware:
- ESP32 camera module (Tested with Seeed Studio XIAO Sense with the OV2640 camera and also the ESP32-CAM)
- PC with a USB port
- USB cable
- WiFi connection / stick
Software:
- Python with the necessary libraries installed
- ESP32 Firmware
ESP32 Setup
Quickstart
- Flash your ESP32 with the appropriate firmware from here.
- Once flashed, the board attempts to connect to a WiFi network (SSID: Blynk, Password: 12345678). If unsuccessful, it'll create an access point named Matchboxscope_XXXX. Connect your computer to this network.
- Test the stream at: http://192.168.4.1
Detailed ESP32 code and streaming setup
Python Interface
Our key goal is to implement an interface to perform HTTP requests on the ESP32 Server that retrieve JPEG frames as well as setting parameters on the camera side. We have implemented a Napari plugin that was derived from @jacopoabramo's Napari-recorder here https://github.com/Matchboxscope/omniscope-viewer/blob/main/src/omniscopeViewer/control/devices/omniscope.py It has several stages:
- Discovering available ESPressoscopes
- Starting the stream
- controling parameters
- display the camera stream
Ensure you're working in a Python virtual environment to keep dependencies isolated:
python3 -m venv esp32env
source esp32env/bin/activate
Installation of the omniscope-viewer plugin:
git clone https://github.com/Matchboxscope/omniscope-viewer/
cd ominiscope-viewer
pip install -e .
or
pip install git+https://github.com/Matchboxscope/omniscope-viewer/
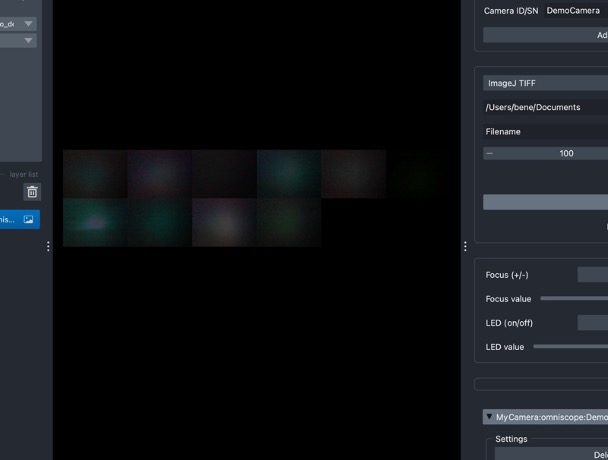
Walkthrough Napari Plugin
Steps to start the viewer:
- Start Napari
- Connect to the ESPressoscope using the Wifi/Accesspoint
- Open the "omniscope-viewer" plugin
- select the
omniscope(this is designed for a multicamera view, but the ESPressoscope works equally well) - Wait until the device is discovered (Napari becomes inresponssive for a few seconds)
- Start stream
- Done :)

Basic concept
The below snippet visualizes the idea of how python retrieves the frames:
def capture_frame(url):
    while True:
        try:
            stream = requests.get(url + ":81", stream=True)
            bytes_ = bytes()
            for chunk in stream.iter_content(chunk_size=8*1024):
                bytes_ += chunk
                a = bytes_.find(b'\xff\xd8')
                b = bytes_.find(b'\xff\xd9')
                if a != -1 and b != -1:
                    jpg = bytes_[a:b+2]
                    bytes_ = bytes_[b+2:]
                    frame = cv2.imdecode(np.frombuffer(jpg, dtype=np.uint8), cv2.IMREAD_COLOR)
                    # Here, integrate with Napari or any other visualizer of your choice
        except (requests.exceptions.RequestException) as e:
            print("Error occurred:", e)
            time.sleep(5)
The requests package performs a get-request on the address 192.168.4.1:81 and converts the returning bytes into an image.
By calling this function repeatetly a stream can be converted into several RGB numpy frames. The original code is designed to also display multiple cameras, hence we call it omniscope, but the result is the same. the images just get concatenated to form a grid instead.
The discovery works by pinging all IP addresses within a subnet and trying to get an answer for the keyworkd "omniscope" or "cam_name" when requesting the URL 192.168.4.1/status The returning dictionary looks for example like this: {"lamp":100,"autolamp":1,"min_frame_time":0,"framesize":8,"quality":12,"xclk":8,"brightness":-1,"contrast":0,"saturation":0,"sharpness":0,"special_effect":0,"wb_mode":0,"awb":0,"awb_gain":1,"aec":0,"aec2":1,"ae_level":-1,"aec_value":797,"agc":0,"agc_gain":5,"gainceiling":2,"bpc":0,"wpc":1,"raw_gma":1,"lenc":0,"vflip":0,"hmirror":0,"dcw":1,"colorbar":0,"cam_name":"Matchboxscope","code_ver":"Apr 17 2023 @ 09:18:49","rotate":"0","stream_url":"http://192.168.137.69:81/","anglerfishSlider":"1"} You can try it out yourself
For a more advanced interface and multi-camera setup, refer to the Omniscope project.
More theory on Accessing ESP32 Camera Frames Using Python and REST API
This is a bit more explanation on how you can access the frames
Setup the Environment:
First, ensure you've set up your Python environment and installed the required libraries:
pip install requests opencv-python numpySending an HTTP Request to Retrieve a Frame:
The ESP32 camera, when set up as an HTTP server, can provide frames as JPEG images in response to specific requests. One common endpoint might be
/capture, which returns a single JPEG frame.import requests
import cv2
import numpy as np
# Define the camera's API endpoint
CAMERA_ENDPOINT = "http://192.168.4.1/capture"
# Fetch the JPEG image from the ESP32 camera
response = requests.get(CAMERA_ENDPOINT)
# Check if the request was successful
if response.status_code == 200:
# Convert the image bytes to a numpy array
image_np_array = np.frombuffer(response.content, dtype=np.uint8)
# Decode the numpy array into an image
image = cv2.imdecode(image_np_array, cv2.IMREAD_COLOR)
# Display the image
cv2.imshow('ESP32 Camera Frame', image)
cv2.waitKey(0)
cv2.destroyAllWindows()
else:
print(f"Failed to retrieve image. HTTP Response Code: {response.status_code}")The script above does the following:
- Sends a GET request to the
/captureendpoint of the ESP32 camera. - If successful (HTTP status code 200), it converts the JPEG byte data into a numpy array.
- Using OpenCV, the numpy array is then decoded into an actual image, which can be displayed or processed further.
- Sends a GET request to the
Streaming Frames:
To continuously fetch and display frames (essentially streaming the video feed), you can place the request and image processing code inside a loop. You might also want to include error-handling mechanisms to handle scenarios where a frame might not be fetched successfully.
while True:
    response = requests.get(CAMERA_ENDPOINT)

    if response.status_code == 200:
        image_np_array = np.frombuffer(response.content, dtype=np.uint8)
        image = cv2.imdecode(image_np_array, cv2.IMREAD_COLOR)

        cv2.imshow('ESP32 Camera Stream', image)

        # Break the loop if 'q' key is pressed
        if cv2.waitKey(1) & 0xFF == ord('q'):
            break
    else:
        print(f"Failed to retrieve image. HTTP Response Code: {response.status_code}")

cv2.destroyAllWindows()
This script continuously requests frames and displays them, giving the appearance of streaming. Pressing the
qkey will stop the streaming and close the display window.
Conclusion
You've now established a connection between the ESP32 camera and Python to visualize the streaming data using Napari. Explore more, adapt, and expand based on your needs!
Feedback & Community
Your contributions are invaluable! Share results, raise questions, or suggest modifications by creating an issue in the repository.